Cooking here is:

My photo
First food I have ever made was from the Sesame Street book and I was maybe 7 years old, It was a damn good soup!

Monday, March 28, 2011

Little tart - use it as a vehicle for your favourite flavors!

I really love small treats, sweet or savory. They can easy satisfy any craving.
This time I decided to make little tarts, using an universal pie crust or tart recipe called pate brisee.
The dough is extremely easy to make and is so versatile!!!
Use it to make any tart, small or big, any pie sweet or savory, perfect as any kind of quiche base. Once baked the crust is flaky and light. Pre-baked is perfect for any kind of wet filling.
I used it to create small fruity baskets, filled with a classic pastry cream- creme patisserie, that again can be used in so many different desserts like: eclairs, donuts or even Napoleons.
This treat will be perfect for any party or for a romantic dinner dessert (you can prepare it in advance), or just like that because you deserve it!


you need:


rolling pin,
8-10 small tart tins or muffin tin,
food processor or bowl and knife,
mixer or bowl and whisk,
sauce pan,
plastic wrap,
aluminum foil,
little stones or beans or coins,
sifter,
pastry brush,
1 plastic bag or pastry piping bag

ingredients:


for the dough (pate brisse):
2 cups all purpose flour
1 teaspoon salt
1 tablespoon sugar
12 tablespoons very cold butter (170 g)
1/2 cup very cold water

for the filling:
1,5 cup milk
3 large yolks
1/4 cup sugar
2 tablespoons cornstarch or potato flour
1 tablespoon all purpose flour
1/2 vanilla or 1 teaspoon vanilla extract (can use lemon extract instead)
2 cups assorted berries (strawberries, blueberries, raspberries, blackberries etc..)
1 tablespoon of any kind of jam or marmalade


In a sauce pan, heat up milk with vanilla bean or the extract, don't let it boil! In a bowl combine egg yolks with sugar, sift in cornstarch and flour, mix well. Once the milk gets to the stage, just before boiling, remove the vanilla, scrape the seeds inside the milk and start tempering you egg-starch mixture, by slowly adding milk inside and whisking it good together ( do it slowly, do not scramble your eggs! ). Next pour the mixture back into the saucepan and cook it on a medium-high heat, stirring constantly until the mixture becomes very thick. Transfer it back into the bowl, cover the surface of the cream with the plastic wrap , that will prevent it from  forming a film on the top.


When its cool, put it to the refrigerator and let it chill for at least 1-2 hr. before using it. In the meantime you can start working on your dough.

Add flour, salt and sugar to a food processor and pulse until combine (use the one with blades attachment).


Add cold butter and pulse until big crumbs start creating. Next, drizzle cold water into the mixture (I add 1-2 ice cubes to the 1/2 cup of water, just to keep it nice and cold), dough should start forming. If it holds together you don't need to add all the water inside, try not to make the dough wet and sticky.
(If u don't have food processor, add salt, sugar and flour to a large bowl and mix it together. Add butter and with a knife cut the butter into flour, until crumbs starts forming. Add slowly cold water, use hands to press it together. Do not over-work the dough!)
You will have buttery chunks inside your dough, this is perfectly fine! Once dough is formed, wrap it in a plastic wrap and refrigerate for at least 1 hr.

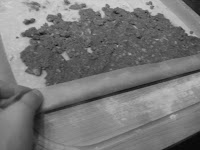
After 1hr. or so, when your dough is chilled nicely, roll it on a good floured surface. Make it about 1/2 inch thick (little less than 1 cm).
Use your rolling pin, to place the dough on the tart tins, next press it gently with your fingers inside the tins and trim the excess of the dough with the rolling pin.


(If you use the muffin tins, use a big drink glass to cut out the discs and place them inside the tin). Preheat oven to 350° F (180° C), get the little tarts ready for the pre-baking process, which is best for cold serving or liquidy fillings (pumpkin filling, quiche).
What you need to do is prevent the dough from forming bubbles on top and losing its shape, while pre-baking it. The best way is to cover it with parchment paper or aluminum foil and press it down with some weigh like beans, small stones or coins. (Remember to clean very good the stones or coins before using them. Try not to let them touch the dough itself)


Then insert into hot oven and keep it there for 15-20 min. For this recipe the crust is used cold, thats why I leave the tarts inside oven, uncovered on broil for 1-2 min. just to give them some color. If you plan to re-bake it with the filling inside you can skip the browning step. When your tarts are done, cool them and start filling them with delicious goodness!

Now your shells are ready, your pastry cream is chilled, time to wash and cut your berries! You can use almost any kind of fruits to make those colorful and tasty baskets, but berries are just perfect for the small size treats. Warm up the tablespoon of jam or marmalade in a microwave or on the stove until it is runny.


Transfer the pastry cream from the bowl to a plastic bag (the storage kind) snip the end corner with scissors, fill it up with the cream and you have a pro piping bag.


If you have a special pastry one, then feel free to use it. Pipe the cream inside your little tarts.


Next, garnish with berries and brush the berries with a warm jam, that will make them look beautiful and glossy also will prevent from darkening or drying out. Chill your little tarts before serving. They look as good as they taste!


Thursday, March 24, 2011

Melon sorbet with pistachio brittle

The spring is a bit lazy this year. Winter was long, cold and full of snow, thats why I was looking forward to see any signs of spring in the air. Not happening.
Rained even snowed the other day ... that's why I decided to boost up my mood and jump straight into summer! Weather outside and a lonley cantalope in my fruit basket inspired me to make a delicious sorbet, and a crunchy brittle...why not?  if the spring wanna look like this, I need to color it up a notch.


you need:
blender or food processor,
large airtight plastic container or an ice cream machine,
baking sheet,
aluminum foil,
sauce pan,
wooden spoon,

ingredients:


for the melon sorbet:
1 middle size melon/cantaloupe
1/3-1/2 cup powdered sugar (depends how sweet the fruit is )
2 shots of vodka 4oz. (50 ml)  or same amount of orange juice
half a lemon

Peel and cut the cantaloupe into small cubes, or any size that will blend easy. For this recipe you can use almost any kind of fruit (watermelon, strawberries, peaches, mangoes, raspberries etc..), just make sure that the flesh is soft and juicy enough.


To start blending add 2 shots of vodka (can be flavored vodka, rum or fruity liquor), if you wanna make a non-alcoholic sorbet use same amount of orange or pineapple juice.
When blended good, until smooth add powdered sugar and squeeze the lemon juice inside and pulse it again.
(If u don't have powdered sugar, you can easily make it, by blending regular sugar  in a coffee grinder. If u don't feel like doing it, use regular crystal sugar but make sure you mix it in well). Taste it and check if its sweet enough for you.


Transfer the sorbet to an airtight container and chill it in the fridge for 20-30 min. (the pulp must be chilled before freezing it). The texture should be firm and fluffy. (If you have an ice cream maker pour the chilled mixture into it and process according to manufacturer's directions).


Once chilled place in the freezer for 3 to 4 hours before serving.
This sorbet is perfect solo or as a smoothie with a mint garnish, or as a melon margarita base.


for the pistachio brittle:
1/2 shelled pistachios
1 cup sugar
1/4 cup water
a pinch of cayenne pepper (can omit)
1/2 teaspoon vegetable oil

Place the aluminum foil on a baking sheet, 10 x 10 inch ( about 20 x 20 cm). Use aluminum foil to make a rim if your baking sheet is bigger. Coat it with vegetable oil, so the brittle wont stick to it.
Coarsely chop your pistachios, remove the dust and fine pieces. ( If you don't have pistachios, use almonds or hazelnuts).
Add sugar and water to a heavy sauce pan, heat it up over medium-high heat. Stir it occasionally with  a wooden spoon.
The sugar will start to boil fast, now you need concentrate, because you are working with a very hot and sticky mixture. Working with sugar is not as easy as you may think. You need to boil it about 9 minutes!

First stage will look transparent and thick, next will start to bubble and get really thick. At this point you can add a pinch of cayenne pepper for a slight touch of heat. (You can use, nutmeg or cinnamon).


The last stage will come right after it and you need to stay focused, it will get golden very fast! Stir it vigorously.


As soon as it becomes brownish take it off the heat and pour onto the ready, pre-greased baking sheet. Move the sheet around so the thick sugary mixture coats it all. Sprinkle with pistachios evenly.


Let stand until hardened, about 15 min. Lightly bang the baking sheet on the table to break the brittle into pieces.
Serve it with the melon sorbet or vanilla ice-cream. The sweet and salty brittle will be a perfect companion for cold sorbet or ice-cream. MmmMMmMmmmmm


Tuesday, March 22, 2011

Cinnamon-walnut Swirl Cookies

"Oki, this is my last one''... how many times have you said that and yet, u grabbed another guilty treat?
So prepare yourself, these cookies will make u go nuts! Not only because they have a rich amount of them inside, but mostly because they are cranchy, toasty and light at the same time. Ah! and your kitchen will smell like a warm heaven while baking them.


you need:
baking sheet,
rolling pin,
parchment paper,
plastic wrap,
sifter,
2 large bowls.


ingredients:

for the dough:
2 and 1/2 cups flour (all-purpose or bread)
1 teaspoon salt
1/2 teaspoon baking powder (or baking soda will work as well)
2 sticks butter softened (220g)
1 cup sugar
2 eggs
1 teaspoon orange or lemon zest

for the filling:
4  tablespoon unsalted butter softened (50g)
1/2 cup light brown sugar
1/2 cup dark brown sugar
(if u have only 1 kind use full cup of it)
1/2 cup toasted and chopped walnuts
1/2 teaspoon cinnamon

First combine (best in a kitchen robot aka Kitchen Aid aka my 2nd husband, or just use a mixer!) butter with sugar, when well mixed start adding eggs (room temperature ALWAYS when u bake with eggs). Add first egg, mix it well and  then add the other. Add the lemon zest to make it smell fresh and fruity.
In the other bowl combine your dry ingredients, sift in flour, salt and baking powder. Now start adding dry ingredients to the bowl with butter-egg mixture, slowly in portions. DO NOT OVER MIX THE DOUGH!
Making almost any kind of cookies remember : mix  the wet and dry ingredients good, but never over mix them, that will make your cookies heavy and doughy, big no no!

Ok, now you have combined your ingredients, the dough is dense but soft to the touch. Wrap it in plastic wrap and let it rest in the fridge for a min. 1h. (can stay over night if  you plan to bake them the next day, you can also freeze the dough up to 1 month)

While your dough is chilling in the fridge, make the filling.
It's easy and fast, so think of what else you gonna make while waiting for it.
Combine 4 tablespoons of softened butter with light and dark brown sugar, add cinnamon.
Chop the walnuts, put them in a large skillet or into baking sheet and roast in the preheated oven at 400° F (200°C), for 5-7 min. Just to let them release their natural oils. This way you bring them back to life and make them fragrant and toasty (Warning! don't burn the nuts, because instead of roasty -toasty flavor you will have burnt disaster). Combine the nuts with butter and sugar mixture. 


Take your dough and roll it. (remember to sprinkle your rolling surface with flour, this kind of dough when getting warm is getting very sticky. If it starts to get to sticky, put it into the freezer for few minutes, it will get cold and easy to work with again). The dough must be cold and firm.  

What I do is: I take a rectangle piece of parchment paper, I roll the dough on it, make it 1/2 inch (1 cm) thick. Trim the edges.


Then I put it back into the freezer to make it firm again. Next I roll it back, sprinkle with the delicious filling, starting from the side of the dough closer to me and then I use the parchment paper as a rolling tool (just like you use bamboo mate to roll  sushi ). You can easily roll 3 sheets 15 x 10 inch (35 x 25 cm).


When is rolled nicely I glue the very end of it, with egg wash or a bit of water. And yes, need to stick it inside the freezer once again before cut it.


Cut the cookie roll with a sharp knife into nice discs, make them 1 inch thick (about 2 cm).


Bake them on the parchment paper you used to roll the dough, in a preheated oven, at 350° F (180° C) for 15-19 min until lightly brown, let them cool (that's the hardest part  I know ).
Once cool they are ready to munch!


Monday, March 21, 2011

Dont be affraid ... make a Crème brûlée!

I need to start with a dessert!
Forgive me, but I need to face this blogging adventure, like I faced my biggest fear in the kitchen... dessert!
But not any dessert, oh no! creme de la creme of all the desserts, light and creamy hidden under a crunchy layer of caramely goodness... Crème brûlée.


Yes! it is a French dessert. Yes! it tastes fancy and sophisticated. Yes! everybody believes, it must be almost impossible to make and hard to execute, without 10 years of culinary experience and a pastry sue-chef on hand. I think it is a world-wide French conspiracy, so we would all go to the restaurants and pay (sometimes a lot -.-), to try this velvety treat. So here I make it official: this dessert is EASY! 4 simple ingredients and  a bit of patience, but trust me its totally worth it!

You need:
4 oven safe ramekins,
sifter,
whisk,
bowl,
sauce pan,
roasting pan or deep oven safe dish


Ingredients:
(serves 4... if u are lucky hahahaha )

2 cups heavy cream (double cream)
1/3 cup sugar + 4 teaspoons
4 egg yolks
1/2 vanilla bean (or 1 teaspoon vanilla extract)


Preheat oven to 320° F (160°C ).
In a sauce pan add heavy cream and vanilla, heat it up but dont let the cream boil!
Take it off the heat just before it starts to boil,  let the vanilla bean infuse into the cream (for 5-7min).
Take it out, split the bean in two and scrape the vanilla beans into the liquid.
(if u used vanilla extract just stir it good into the hot cream)

In a bowl whisk 4 egg yolks with 1/3 cup of sugar.
Whisk it gently, dont make it to creamy!
Temper your egg and sugar mixture, by adding slowly the warm cream and whisking it vigorously together.
(add first few spoons of cream, really slowly so u dont scramble the yolks!)


Strain the liquid through a sifter to make it velvety and pour into ramekins.
A very important part is to collect with a spoon all the air bubbles formed on the surface, from pouring.
The surface of the liquid must be flat, that will prevent it from burning and help create a nice, silky texture.


Now put the ramekins inside the roasing pan or oven safe dish and add warm water to the dish, max till 3/4 height of the ramekins.
This technique is called water bath (fr. bain -marie), prevents the custard from a direct heat, keeps it moist and prevents from cracking. This cooking method is perfect for cheesecakes and any kind of custard.


Put the dish with the ramekins into the hot oven, bake for 40-45 min. until the liquid transforms into custard.
Cool for 1-2 hours, sprinkle sugar on top and put back into the oven, broil/grill for 2-3 mins (keep an eye on it!!!!)


The sugar will create a nice, brownish, caramel-like crust, which will make a lovely sound, so come on! grab a spoon and dig in!

voilà!